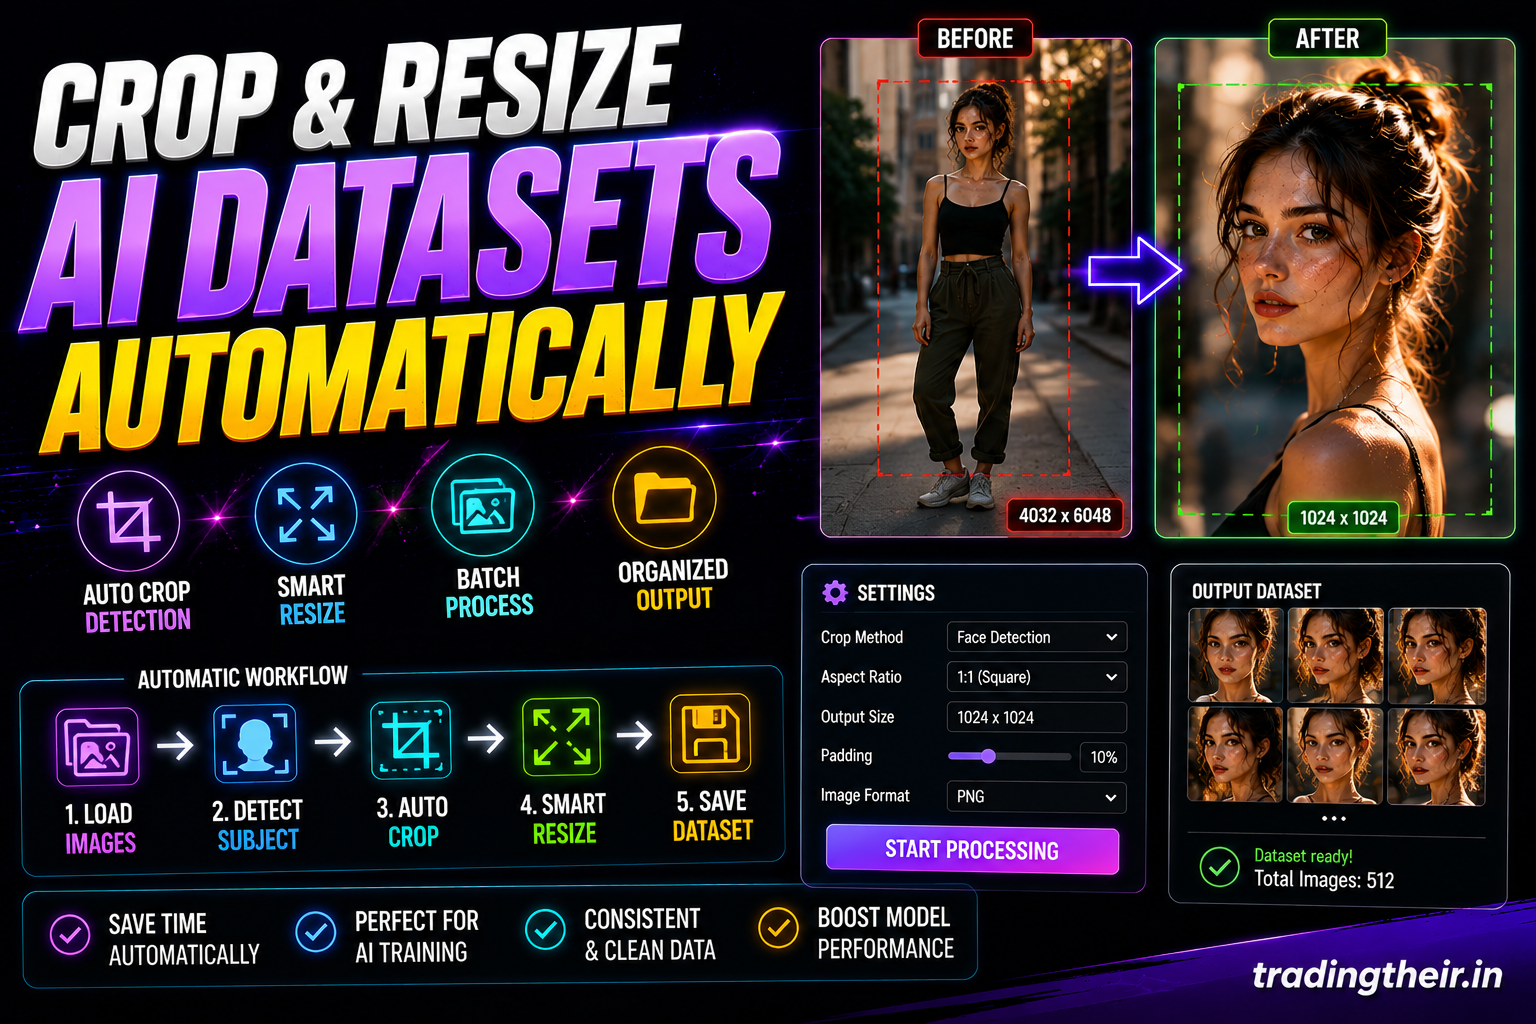
Machine learning relies entirely on data uniformity. When you gather source images for a custom Low-Rank Adaptation (LoRA) model, your raw files will come in wildly different shapes and sizes. You might have massive vertical smartphone photographs mixed with wide horizontal landscape wallpapers. Feeding these mismatched dimensions directly into your local training script is a massive technical mistake. It causes severe processing errors, distorted visual anatomy, and immediate script crashes. To build a highly effective neural network, you must learn how to crop & resize AI datasets automatically.
Manually editing every single training image inside Adobe Photoshop ruins your creative productivity entirely. Selecting the crop tool, resizing the canvas canvas parameters, and saving individual files takes hours of tedious labor. When you want to train on a dataset of fifty images, manual editing becomes completely unviable. Today, advanced open-source automation tools solve this workflow bottleneck completely. This comprehensive guide reveals the absolute best local methods to automate your image preprocessing pipeline flawlessly.
Why Resolution Consistency Defines Neural Logic
Artificial intelligence diffusion models do not view images the way humans do. They process visual graphics inside a mathematical sandbox called latent space. Legacy generative models like Stable Diffusion 1.5 are hardcoded to prefer exactly $512 \times 512$ pixels. Modern architectures like Stable Diffusion XL (SDXL) and Flux are strictly optimized to calculate vectors at a massive $1024 \times 1024$ pixel resolution.
If you feed a small, low-resolution 400-pixel graphic into an SDXL training configuration, the Python code behaves aggressively. It stretches the pixels forcefully to hit the mandatory 1024-pixel threshold. This artificial stretching introduces severe visual blurriness and blocky digital noise. The neural network will mistakenly study this blurriness as a deliberate artistic style. It ruins your final model output permanently. Automating your scaling procedures guarantees that your graphics card processes pristine, razor-sharp inputs from the very first mathematical epoch.
The Tragedy of Aspect Ratio Distortion
Many beginners try to bypass cropping entirely by forcing a simple resize command on their folders. This lazy approach creates a catastrophic visual phenomenon called aspect ratio squashing. Imagine a high-resolution vertical portrait of a model. If you forcefully squash that vertical image into a rigid $1024 \times 1024$ square canvas without cropping, the proportions break completely.
The subject’s face will look unnaturally wide and heavily compressed. The surrounding geometry will warp violently. If the neural network trains on squashed pixels, it will memorize those broken proportions as absolute truth. When you generate images later using your completed .safetensors file, your characters will constantly look deformed and warped. You must isolate the correct composition lines cleanly before altering the raw dimensions.
Method 1: Using the Built-In Utility in Kohya SS
The absolute easiest way to process your images locally is to use the integrated data utility tools inside the Kohya SS graphical user interface. This powerful offline utility allows you to keep your entire pipeline unified inside a single application.
Open your local Kohya interface in your desktop web browser. Look at the primary horizontal menu panel located at the top of the workspace. Click on the tab explicitly labeled “Utilities”. From the secondary dropdown menu, select the option named “Image Blurring/Resizing” or “Dataset Preparation”.
Configuring the Smart Crop Parameters
Locate the input directory box inside the utility workspace. Paste the exact Windows folder path where your raw, unedited images are currently stored. Next, create a brand new empty folder on your solid-state drive and paste its directory path into the destination box.
Look at the configuration settings below the folder paths. Set your target resolution parameters strictly to 1024 for width and 1024 for height if you are targeting modern SDXL training. Check the box labeled “Use Smart Cropping”. Smart cropping uses a lightweight object detection algorithm in the background. It analyzes the composition of your image automatically. It identifies the core subject and centers the crop box perfectly around it, ensuring that critical details like human faces or central UI elements are never chopped off awkwardly at the edges. Click the execute button to process your entire folder cleanly in seconds.
Method 2: Bulk Processing with Birme Offline
If you want absolute visual oversight during your automation process, using a dedicated batch resizing tool is highly recommended. BIRME (Bulk Image Resizing Made Easy) is an incredible, lightweight web utility that can run completely offline in your local browser window.
Launch the Birme interface. Drag and drop your entire unorganized image folder directly into the center of the web canvas. The software will instantly display all your training graphics side-by-side in a beautiful visual grid layout.
Adjusting Focal Point Overlays Visually
Look at the global control settings panel on the right side of the screen. Enter your exact desired pixel dimensions. Set the width to 1024 and the height to 1024. A semi-transparent bounding box overlay will instantly appear over every single image in your grid.
This bounding box represents the exact mathematical cut line. If an image is a tall vertical portrait, you will see exactly what parts of the top and bottom will be deleted. The absolute best feature of this tool is the adjustable focal point. If the automated algorithm centers the bounding box poorly on a specific image, you do not have to edit it in Photoshop. Simply click on that specific thumbnail and drag the bounding box up or down manually. This hybrid approach gives you lightning-fast automated processing combined with total artistic veto power. Set the output quality slider to 100% lossless and click the save button to export your clean dataset instantly.
Method 3: Building a Python Script for Total Autonomy
For advanced digital agency workflows, you can completely eliminate external software dependencies by writing a short, custom Python script. This method allows you to execute your preprocessing directly from the Windows command line terminal seamlessly.
You must utilize the powerful Pillow processing library to handle the complex mathematical image modifications. Open your command terminal and type pip install Pillow to ensure the library is fully updated locally. Create a blank text file on your hard drive, name it smart_resize.py, and open it in your preferred code editor.
Writing the Mathematical Resizing Code
Your script must follow a highly disciplined mathematical logic to prevent distortion. It must read the image dimensions, calculate the current aspect ratio, scale the shortest side to 1024 pixels cleanly, and then execute a center-crop to remove the excess pixels. Write your Python execution script using this precise algorithm logic:
Python
from PIL import Image
import os

def crop_and_resize(source_folder, output_folder, target_size=(1024, 1024)):
    if not os.path.exists(output_folder):
        os.makedirs(output_folder)

    for filename in os.listdir(source_folder):
        if filename.lower().endswith(('.png', '.jpg', '.jpeg', '.webp')):
            img_path = os.path.join(source_folder, filename)
            img = Image.open(img_path)

            # Calculate mathematical aspect ratios
            w, h = img.size
            target_w, target_h = target_size

            scale = max(target_w / w, target_h / h)
            new_w = int(w * scale)
            new_h = int(h * scale)

            # Resize without squashing proportions
            img_resized = img.resize((new_w, new_h), Image.Resampling.LANCZOS)

            # Calculate precise center-crop coordinates
            left = (new_w - target_w) / 2
            top = (new_h - target_h) / 2
            right = (new_w + target_w) / 2
            bottom = (new_h + target_h) / 2

            img_cropped = img_resized.crop((left, top, right, bottom))
            img_cropped.save(os.path.join(output_folder, filename), "PNG")

crop_and_resize("C:/Raw_Images", "C:/Clean_Dataset")
This clean script reads your raw folder, applies a high-quality Lanczos resampling filter to maintain crisp texture details, center-crops the image perfectly, and saves the output as a high-fidelity PNG file. Execute this script whenever you want to crop & resize AI datasets automatically without clicking a single visual menu interface.
Method 4: Automated Batch Cropping in ComfyUI
If you spend your entire creative workday inside ComfyUI, you can construct an autonomous dataset processing pipeline directly on your active node grid. This method keeps your visual workspace completely unified.
First, open your ComfyUI Manager and install the ComfyUI-Custom-Scripts or Inspire Pack custom extension suites. These packages contain advanced batch image handling blocks. Double-click your empty canvas grid and add the Load Image Batch from Directory node. Paste your raw image folder path directly into the input text parameter.
Next, search for the specialized Image Resize to Target or Image Crop Location nodes. Connect the image output wire from your batch loader into this modification node. Set your target length constraints to 1024 pixels. Configure the cropping mode option to “center”. Finally, route the output wire into a standard Save Image node. Type a custom prefix name like Dataset_Clean_ into the text box. Click the queue button once. ComfyUI will loop through your entire directory sequentially, processing every single graphic on your local graphics card flawlessly.
The Power of Aspect Ratio Bucketing Explained
Once you have automated your cropping workflow, you must understand a brilliant modern machine learning feature called aspect ratio bucketing. Advanced training scripts like Kohya SS do not technically require every single image to be a perfect square anymore.
Aspect ratio bucketing allows the AI to train on diverse rectangular shapes safely without causing visual warping. The software analyzes your dataset folder and automatically groups images into mathematical boxes, such as $768 \times 1344$ for vertical graphics or $1344 \times 768$ for wide layouts. However, your images must still be perfectly pre-cleaned. You cannot have completely random, un-optimized resolutions like $431 \times 912$ lurking in your directory tree. Running an automated resizing script to normalize your files to standardized bucketing intervals improves training stability massively.
Hardware Protection on Budget Graphics Memory
Processing large batches of high-resolution images places significant computational stress on your local storage drives and processor cores. Your i7 processor and RTX 4050 hardware configuration can execute these batch commands incredibly fast if you optimize your file access patterns carefully.
Always keep your raw training images and your automation scripts located on your fastest internal NVMe solid-state drive. Never run bulk image modifications on a slow external mechanical hard drive or a cloud-synced desktop directory. External drives create massive data read bottlenecks that force your processor cores to sit completely idle, quadrupling your overall processing times. Lossless file operations protect your hardware memory channels from unexpected leakages completely during heavy dataset cleaning sessions.
Executing the Final Visual Quality Audit
Never trust automated software algorithms blindly. After your custom script or utility finishes processing your dataset, you must perform one final manual inspection. Open your destination folder using the standard Windows File Explorer interface.
Change your visual folder view settings explicitly to “Extra Large Icons”. Scroll through the thumbnails slowly and inspect the image boundaries carefully. Did the center-cropping algorithm accidentally cut off the top of a model’s head? Did it slice away a critical navigation button on a web UI mockup layout? If you spot a poorly composed crop, remove that single file from the folder manually. Spend exactly two minutes running that specific image through Birme to fix its focal point. This brief final review guarantees that your local training dataset achieves absolute professional perfection before you launch your main machine learning scripts.